Sunday, October 25, 2015

Homemade Pizza (Inspired by my trip to Italy)


I used to get really annoyed when people would return from travels abroad and say "after visiting Paris food just doesn't taste the same...". Having now just gotten back from my first trip to Europe I can say that I finally know what they mean. Of all the food we had while traveling the pizza in Italy is what stood out to me the most. And since we've been back, I just haven't been able to enjoy my Minneapolis favorites as much as I used to. This inspired me to try and create my own pizza that would transport me back to the local Pizzerias of Florence and Rome.

For this meal I decided to focus on the sauce. Let's be honest, tackling a sauce and dough from scratch is only a recipe for disaster. I took the easy route with the crust and purchased a thin crust store branded option. It wasn't too bad, but obviously making the crust myself would have been the best option. Maybe I'll try that next time....

For the sauce, I really wanted to try and recreate what we had while in Italy. To do so I got the following ingredients:


  • 2 cans (28 ounces) of San Marzanos tomatoes
  • Olive Oil (I used a brand we bought in Florence
  • 2 garlic cloves
  • 1 small onion
  • 1 celery stalk
  • 1 carrot
  • 1/4 pound of italian sausage
  • 1 block of mozzarella cheese
  • 2 tablespoons fresh parsley
  • salt and pepper to taste
First you will need to chop the onion, celery, carrots and garlic. 


Once this is done, put the ingredients in a heated pan with a bit of olive oil. Cook for 5 minutes or until the carrots are tender.


While you let those ingredients sauté, it's time to work with the tomatoes. I chose to buy canned whole tomatoes, but if you have tomatoes at home and are feeling adventurous you could certainly use fresh (just be sure to core the tomato first). 

First take the tomatoes out of the can and drain the juice. Be sure to save the juice, we will be using that in the sauce. After draining chop or mash the tomatoes into small pieces. You can pick the size based on how chunky you'd like your sauce.


Once the tomatoes are drained and chopped you will need to add them and the juice to the pan that has the carrots, onions, celery and garlic. 


Once all of the ingredients are incorporated you will need to let the sauce simmer in the pot for 30 - 45 minutes. This will help build the flavor and thicken it up a bit. If you're finding that the sauce is too watery you can add some tomato paste to thicken it up. Once the sauce looks right and your kitchen is smelling amazing, it's time to add it to the crust!

I pre-heat my oven to follow the instructions for the crust I bought (400 degrees). I put the sauce on the crust and then added my favorite toppings.


Since I bought a pre-made crust the pizza really only needs to cook long enough to melt the cheese and get all the toppings warm. At 400 my pizza cooked for about 15 minutes. Once it was done I sprinkled on some fresh cut basil and was ready to dive in!


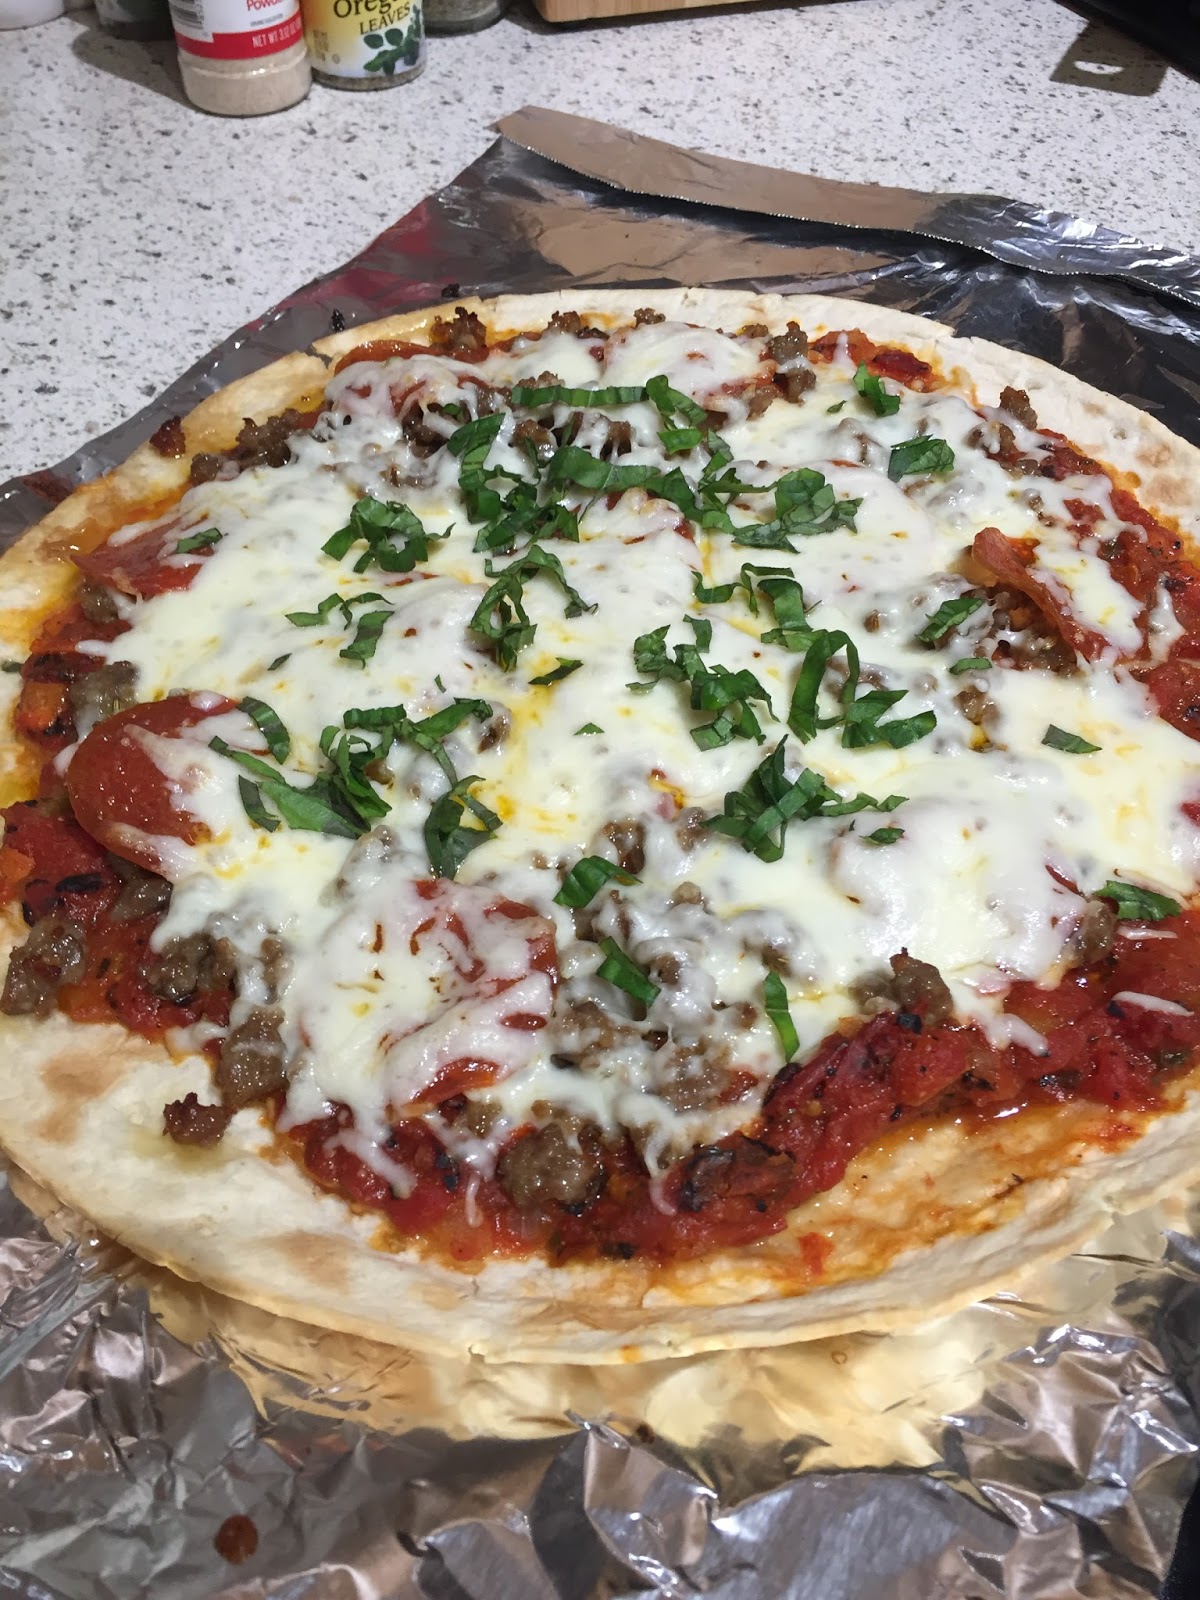
While I won't claim to have made a pizza as good as we had in Italy, this did turn out really tasty! The sauce is thick and chunky and all of the ingredients really made it flavorful. I probably won't use this thin crust again because the sauce didn't really stick to it so we had to eat with a fork and knife (which is actually how the Italians eat pizza anyway!). 

This sauce was delicious and I had plenty of remaining after making 2 pizzas. I plan to freeze it and use it over pasta!


Sunday, October 12, 2014

Roasted Chicken and Potatoes with Lemon and Rosemary


This week I knew I wanted to stick with my fall comfort food theme for my next post. After crock-pots the next thing on my list was roasting. I love roasting meats and veggies for fall. The texture and taste is perfect for colder weather. It's also super easy (you may be noticing a trend with my meals - ease is key). What I love is that you just throw everything together in a pan, toss it in the oven and wait for dinner to be ready. 

Here's what you need for tonight's dish:

- 1 lb Chicken (I used breast because I had it on hand, but if you have thighs that works too)
- 3 lemons
- Rosemary 
- 1 onion
- 3 cloves of garlic
- 1/3 cup olive oil
- Red pepper flakes
- 8 - 10 baby red potatoes
- salt and pepper to taste

To start, pre-heat your oven to 400 degrees and spray a pan with non-stick cooking spray and lay your chicken flat across.


After your chicken is in the pan you can add the potatoes and onions. I chopped both into large pieces and scattered across the pan.


From there take one of your lemons and slice it thinly. Then take the slices and add them on top of the chicken along with some of the rosemary sprigs.


Now that all of the basics are in pulled together, it's time to work on the sauce. In a small bowl whisk together the lemon juice (from the remaining two lemons), olive oil, rosemary, garlic and the red pepper flakes. Pour this mixture evenly over the chicken and pop in the oven for an hour, or until the chicken and potatoes are done.

Once the food is done just plate and enjoy! You'll love how flavorful the chicken is with just a few simple ingredients! The lemon really adds a nice citrus taste to the chicken and is complemented with the spice of the red pepper flakes. The potatoes and chicken will have just a nice crisp to them from the sauce, but is super juicy on the inside. 


If you're looking for other chicken dishes click here or comfort food dishes click here.

If you give this recipe a try let me know what you think. I hope you enjoy it as much as I did! 


Sunday, October 5, 2014

Crock-Pot Loaded Baked Potato Soup


Well friends, I hate to say it but summer is officially over. Well, at least here in Minnesota. But you know what, let's focus on the positive shall we? Fall brings a lot of my favorite things: apple picking, pumpkin patches, leaves changing colors. But more than any of that, my favorite thing about fall has GOT to be.... my crock-pot. After receiving one for Christmas last year the world of crock-pot recipes has been opened and it truly is endless. From chili to roasts to pastas. You can really make anything in one of these. 

With that, it only seemed appropriate that my first post of the fall (and in quite some time as well) would be a crock-pot recipe. My mind went immediately to one of my favorite soups - loaded baked potato. Does anything say fall comfort food like a cheesy potato soup? Other than mac 'n cheese, I don't think so.

What's great about this recipe, and any crock-pot recipe at that, is that they are so easy and don't take much time to prep. All you need to do is gather all of your ingredients, throw them in the pot, and then let you home fill with the delicious aroma. When you lift the lid a few hours later all the magic of the crock-pot comes to life.

This recipe is super simple and only requires a few ingredients, most of which you may already have on-hand:

6 potatoes
1 white onion
1/4 stick of butter
1 quart broth (I used low sodium vegetable broth)
1 cup cream (I used half and half)
3 cloves minced garlic
2 cups cheese (I used 1/2 cheddar and 1/2 colby jack)
Salt and pepper to taste

To start, simply peel your potatoes and dice your onion. They can go directly into the pot.


Next, pour in your stock of choice and butter. There's no need to melt the butter, you can just cut it up and drop it in.


And then, that's it! Now you can kick-back and enjoy the rest of your day. If you're like me, you're crockin' on a Sunday and can finish the rest of your chores like laundry, cleaning, etc. All the while, magical things are happening under the lid. There's no need to check, but I can't help but lift the lid and stir every couple of hours... mostly to smell what's cooking. 

You can let this cook for 8 hours on low, or 4 hours on high. Just so long as the potatoes are tinder and break-apart with the touch of a fork.


Once finished, you'll need to mash the potatoes a bit to your liking. I prefer my soup a little chunky so I just mashed them coarsely. Once finished mashing, this is when we add the cheese and cream. Don't worry if the soup seems very watery before adding the cheese and cream. These ingredients will help thicken it up.


After adding the final ingredients, all that's left is to garnish and serve! I added sliced green onions and bacon to mine. I also tried topping with croutons to add a little crunch and it was delicious!


And there you have it! It doesn't get much easier than this guys - so you have no excuse to skip out on Sunday dinner next weekend. Crock-pots can be such a huge life-saver and the options are honestly endless. You'll see throughout the fall and winter as I post some of my favorite recipes. Check out my last post for pot roast.

Hope you enjoy! Until next time, happy cooking! 


Monday, February 17, 2014

Chicken and Bacon Fettuccine

Sometimes on a Monday night you just need to embrace comfort food. Not necessarily because it was a hard day (aren't all Mondays?), but more because making it through the first day back from the weekend is a real accomplishment. Especially after 6+ inches of snow... thanks again Minnesota.

Tonight on the menu was Chicken and Bacon Fettuccine. Yes you read that right, BACON. This simple twist on a classic really adds a nice depth of flavor. Check out the delish photo and recipe below. Enjoy!


INGREDIENTS
4.5 oz fettuccine noodles
2 tablespoons butter
2 tablespoons all-purpose flour
1 cup chicken broth
1/4 cut half and half
3/4 cups diced chicken
3 slices bacon (cooked crisply)

DIRECTIONS
Turn your oven to 400 degrees and place the bacon on an un-greased cookie sheet. While the bacon is cooking, boil the fettuccine noodles and sear your chicken in a pan. Instead of using chicken breasts, I really like to used the pre-cut frozen Tyson chicken - it's a lot easier and tastes exactly the same!

While all the ingredients are doing their thing, you can begin to build the sauce in a separate pan. If you don't want to make your own sauce, you can of course use your favorite Alfredo sauce from the jar.

Once everything has finished, simply just combine it into one pot, add some oregano/basil/parsley and you're done! Don't plan on having left-overs - it's THAT good! 

Sunday, February 9, 2014

Cheesy Chicken Orzo


These past few weeks I have been making a conscious effort to meal plan. Instead of just buying the same things each week at the grocery store and hoping for different results, I dedicated 30 minutes to my Saturday afternoon to think of meal options for each day of the week. I really liked doing this because I could make sure we have a variety of meals throughout the week and we rely less on the frozen varieties... You can also try to pick recipes that leverage some of the same ingredients to try and be more cost effective.

One of the meals from this plan was a tasty Cheesy Chicken Orzo. I'd never cooked with orzo before, so this was a first for me. For those of you that don't know, orzo is basically in between rice and noodles. It's a pretty fun alternative to your pasta game if you're looking to mix it up.

This recipe is VERY simple and quite yummy. The base ingredients are pretty neutral so you can flavor to your liking. For this meal my Mom was over and she doesn't like much spice. If it were just T and I, I probably would have opted for some red pepper flakes or cayenne pepper. Instead, I went with the 'safe' Italian seasoning.

Check out the recipe below and give it a try! It's a nice rotation into your weeknight meals that's a synch to make and only takes about 20 minutes!

INGREDIENTS

2 tablespoons olive oil
2 whole chicken breasts cut into 1-inch cubes
salt and pepper to taste
1 cup orzo
1/2 cup shredded cheddar cheese
2 tablespoons butter
1/4 cup milk
tablespoons italian seasoning 


Instructions
Heat olive oil in a large skillet.
Add chicken pieces to the skillet, season with salt and pepper, and cook over medium heat until done; about 10 to 15 minutes, stirring occasionally. Set aside.
Bring a pot of water to boil, and stir in the orzo.
Cook for 5 minutes, or until orzo is tender.
Drain.
Put the orzo back in the pot and stir in the cheese, butter, and 1/4 cup milk; add more milk if needed. Continue to stir until smooth and well combined.
Stir in the cooked chicken.
Taste for salt and pepper and italian seasoning.
Serve.

Wednesday, December 25, 2013

Homemade Peanut Butter Dog Treats

This Christmas I wanted to make our dog treats from scratch vs. just buying them at the store. (I think this actually ends of being more cost effective as well. This recipe made over 4 dozen treats for us because we made them small). Trust me, it is SO easy. Why? Because if you mess up, who cares? Trust me, your dog will still enjoy :).


To get started, you'll need just a few ingredients. You might already have all of these around the house:
Vegetable Oil Cooking Spray
2 cups whole wheat flour
1/2 cup old fashioned oats
1 tablespoon baking powder
1 cup low sodium chicken broth
1 cup creamy peanut butter

All you need to do is mix all of the ingredients together as if you were making a batch of cookies. Since these were for Christmas, I used Christmas cookie cutters for fun shapes. Any other time of year you could use dog bones, etc.


Pre-heat your oven to 375. Spray a cookie sheet and spread out the treats. Cook for about 15 - 20 minutes, or until they are golden brown on top. Remember, they are for dogs. A little soft or a little crunchy? I doub't they will mind! 

Mackenzie and all of her friends have been enjoying these treats for the past week. Hopefully your dog will too!


Monday, December 9, 2013

Easy Twist: Upside Down Pizza

If your house is anything like ours, we tend to get bored of the same routine - pasta, tacos, chicken, pizza - sometimes you need to shake it up! But then you start thinking of shaking up, and that means an extra trip to the grocery store, and more planning on your weekend when all you really want to do is....nothing! So how do you avoid the dinner hum drums? Just take some of your favorite dishes and mix it up a bit using what you already have!

This is what we did this weekend when Sunday was rolling around and I didn't have a plan for dinner. I knew we had what was needed to make pizza, but how could I switch it up a bit? I looked to my friends at www.pillsbury.com and got a great idea! Upside Down Pizza!


This was a really easy and fun dish. We ommited the olives because, well they're gross. Take a look below and try it out for yourself!

Ingredients


1
lb bulk mild Italian pork sausage
1
jar (14 oz) pizza sauce
1
package (8 oz) sliced fresh mushrooms
2
cups shredded mozzarella cheese (8 oz)
1/2
cup sliced drained roasted red bell peppers (from 7.25-oz jar)
1/4
cup sliced ripe olives
1
can (13.8 oz) Pillsbury® refrigerated classic pizza crust
2
tablespoons olive oil
1/2
teaspoon Italian seasoning
2
tablespoons grated Parmesan cheese

Steps

Heat oven to 400°F. Spray 13x9-inch pan with cooking spray.
In 12-inch nonstick skillet, cook sausage over medium-high heat 10 to 12 minutes, stirring occasionally and breaking up sausage with spoon, until no longer pink. Drain if necessary. Stir in pizza sauce, mushrooms, mozzarella cheese, bell peppers and olives. Spoon mixture into pan; spread evenly.
Unroll dough. Shape dough to fit over sausage mixture in pan. Brush dough with olive oil. Sprinkle with Italian seasoning and Parmesan cheese. Use sharp knife to make several 1-inch slits in dough.
Bake 25 to 30 minutes or until crust is golden brown.

Sunday, September 22, 2013

Amazingly Easy Pot Roast

OK guys, it's official. I am in LOVE with my crock pot. I mean seriously - it can do everything. And on top of that? It makes everything easy. You can pretty much think of any meal you love, and it can probably be prepared in a crock pot. If you don't have one and haven't discovered its magic, you should just stop reading now and head to Target. You'll thank me later.

Now that we got that out of the way, let's talk about this delicious Pot Roast I made for Terrance and I's 4 year anniversary. We had been talking about having this for a while, but I was always turned off by the amount of work I thought it would take. Once I did my research I realized that it wouldn't be hard at all. It is a tad expensive since there are so many fresh ingredients. That being said, you should have plenty of left overs (we sure did!).

POT ROAST INGREDIENTS
2 - 3 LB Ground Chuck (we used shoulder)
1 container of beef broth
3 medium potatoes (we used Yukon Gold - but whatever you have will work)
1 white onion
3 celery stalks
5 cloves of garlic
3 whole carrots
Salt (lots!)
Pepper (lots!)
Thyme (lots!)

The first step in making this process is chopping all of your vegetables. You can do this however you like, but I recommend cutting into large chunks. These veggies are going to be cooking for a long time so you want to make sure they hold up. Also, it's just nice to chomp into a perfectly good carrot. 


Honestly the hardest part is now over. Yes that might have taken a minute, but wasn't fun (be honest, you like the idea of being a Susie Homemaker - why else have you read this far??). Now it's time to brown the meat. Take out a deep pot and cover the bottom with oil (I used vegetable oil). While that is warming up, take this time to REALLY season the meat with salt and pepper. Once you think you've done enough, add about 3 times that amount. There is a lot of meat here and it is going to cook for a long time. You can't season it enough. Once hot, drop your cut of meat into the pot and sear on each side for about 4-5 minutes. 


Now that the meat is searing and really starting to smell great, it's time to officially get the crock pot involved. I took about 1/2 of the veggies and dropped them in first. Once these are in, I took the salt, pepper, and thyme and seasoned them all. I then added the meat, re-seasoned, and then added the rest of the veggies, and then again... re-seasoned.


Now that everything is in the pot, it's time to pour in the beef broth. Depending on the amount of veggies and size of meat you'll need to use your best judgement. For the amount I outlined above I actually used the whole container (it filled up the pot almost to the top). This will reduce as the cooking progresses. 

I set the crock pot on medium heat and left for work. It cooked throughout the day all on it's own and I didn't have to worry about a thing! In total, the meat cooked for 8 hours. Right before I was going to serve it, I wanted to make a gravy. I simply took some of the "juice" from the pot and mixed it with a little bit of flour. Start with a small amount and add more if needed. This combination made a tasty thick gravy to pour over the meal - yum!

When I started to take out the meat and veggies I actually gasped. First the smell is amazing. If you weren't hungry before, now you'll be starving. Secondly the meat is so tender that it literally breaks apart right when you touch it. I've never had meat this tender - delicious! Once I had everything on the plate I took the gravy and covered the plate. 


So what's the morale of this story? There's actually two:

1. Buy a crock pot. You won't regret it and they aren't expensive. Just do it!
2. Season this like crazy. Even with all of my seasoning I still added more at the end. You can't go wrong here. The flavor of the meat and veggies will be so wonderful as long as you pay attention to the seasoning. 

Now that the leaves are turning colors and the weather is getting colder, crock pot meals are a must. Try this one for your first - it's easy and a sure fire hit! After you've rocked this meal you can conquer the world!

Until next time, happy cooking!

Sunday, August 25, 2013

Grilled Honey Teriyaki Chicken and Tropical Rum Punch

This week I celebrated my 25th birthday and it was quite a week (I even had my own hashtag - #jspearbdaywk). I wasn't feeling very celebratory heading into 25, but it just goes to show that having amazing friends can make anything fun.

Last night I hosted a Luau complete with grass skirts and coconut bras (head to my Facebook page for pictures). For my food contribution I made a Grilled Honey Teriyaki Chicken. This is an easy recipe that really pleased everyone (the chicken was gone within a matter of minutes). What made this chicken tasty was the brine. Check out the ingredients and directions below:

Grilled Honey Teriyaki Chicken
8-10 Chicken Breasts
Brine
2 cups water
1 cup brown sugar (I used dark)
1/2 head garlic, unpeeled
4 slices gently bashed ginger root
2 tablespoons salt
8 sprigs fresh thyme

Teriyaki Glaze
2 cups teriyaki sauce
1/2 cup honey
1 large ginger root
1 head garlic (halved)
1 teaspoon sesame oil
Dash of pepper
Scallions and toasted sesame seeds for garnish

To get started, simply mix all the ingredients for the brine together and pour into a resealable bag. Slice the chicken into desired sizes and dump into the bag. Once the bag is sealed place in the fridge for at least 2 hours.


While the chicken is in the brine mix all of the sauce ingredients together in a bowl and set aside. Heat your grill to medium heat and place the chicken on the grill. Each piece should cook about 10 minutes on each side. Once the chicken is done remove it from the grill and place it in the bowl of sauce. Once the chicken is coated place it back on the grill to cook for 4-5 additional minutes. All that's left after that is to eat it!


Tropical Rum Punch
These portions are suggestions. Honestly this drink will be delicious no matter what so you can portion to your liking (more citrus, alcohol content, etc.). 

1 cup lime juice
2 cups grenadine
2 cups Jamaican white rum
1 cup light rum
2 cups pineapple juice
2 cups orange juice
orange, lime, and lemon slices for garnish


Monday, December 24, 2012

Holiday Dinner Party

As Christmas is quickly approaching I thought I would dust off my keyboard and share with you a holiday recipe I tried last week when having a group of 10 over for dinner. Since this was my first official test as a holiday host, I'm sure you can imagine the stress I felt building as I began to plan the menu. Here are the things I knew going in:

1. I wanted to do pasta: Everyone loves pasta and I'm comfortable making it as I do it often. Also, it's an economical way to serve a large group.

2. I wanted easy appetizers, side dishes: In order to make sure the main-course got my full attention, I didn't spend much time on the other dishes. I went with bagged mixed greens for salad, fresh italian bread from the bakery, and quick and easy bruschetta crackers (recipe below).

3. The meal should be appealing to the eye: The first impression is a great way to make your guests enjoy your meal without even tasting it. I wanted a fun holiday themed table setting, as well as decorations around my apartment.

With all of these taken into account I landed on trying a new recipe (something I was advised not to do) - Three Cheese Rigatoni.


Three Cheese Rigatoni Recipe

3
cups uncooked rigatoni pasta (9 oz)
2
medium stalks celery, sliced (1 cup)
1
small carrot, shredded (1/2 cup)
1
container (8 oz) sour cream-and-chive dip
1
cup shredded Colby cheese (4 oz)
1
cup shredded brick or Monterey Jack cheese (4 oz)
1/4
cup grated Parmesan cheese
1/4
cup milk
1
tablespoon chopped fresh or 1 teaspoon dried basil leaves
1/4
cup Progresso® Panko dry bread crumbs
1
tablespoon butter or margarine, melted
  • Heat oven to 375°F. Cook and drain pasta as directed on package. Return to saucepan.
  • Stir remaining ingredients except bread crumbs and butter into pasta. In ungreased 2-quart casserole, spread pasta mixture. In small bowl, mix bread crumbs and butter; sprinkle around edge of casserole.
  • Bake uncovered 25 to 30 minutes or until hot and bubbly.
Bruschetta Crackers Recipe

This side dish is so easy it doesn't even warrant a step-by-step recipe. All you need are your favorite crackers (I always use the Italian Town House Crackers), cherry tomatoes, and mozzarella cheese. For each cracker slice a tomtit and place on top along with a slice of cheese. To top it off, drizzle with a little olive oil. Finally, throw them in the oven and bake until cheese is melted. Be careful not to burn the crackers!

Other Tips
Along with decorating the table and my apartment I also got some easy and in-expensive party favors for all of my guests. It was a nice way to send them off and it is Christmas after all :)


This meal was fun and easy because I chose a recipe I was comfortable with and started early. I was never rushing to finish which made this day stress-free. I was ready for my guests when they arrived and wasn't stuck in the kitchen while they all got acquainted. 


After my first attempt I am really eager to host another dinner and recommend you do it too. It's a nice way to gather friends together and isn't as hard as it looks. Happy Holidays!