Showing posts with label Weeknight Dinners. Show all posts

Sunday, October 25, 2015

Homemade Pizza (Inspired by my trip to Italy)


I used to get really annoyed when people would return from travels abroad and say "after visiting Paris food just doesn't taste the same...". Having now just gotten back from my first trip to Europe I can say that I finally know what they mean. Of all the food we had while traveling the pizza in Italy is what stood out to me the most. And since we've been back, I just haven't been able to enjoy my Minneapolis favorites as much as I used to. This inspired me to try and create my own pizza that would transport me back to the local Pizzerias of Florence and Rome.

For this meal I decided to focus on the sauce. Let's be honest, tackling a sauce and dough from scratch is only a recipe for disaster. I took the easy route with the crust and purchased a thin crust store branded option. It wasn't too bad, but obviously making the crust myself would have been the best option. Maybe I'll try that next time....

For the sauce, I really wanted to try and recreate what we had while in Italy. To do so I got the following ingredients:


  • 2 cans (28 ounces) of San Marzanos tomatoes
  • Olive Oil (I used a brand we bought in Florence
  • 2 garlic cloves
  • 1 small onion
  • 1 celery stalk
  • 1 carrot
  • 1/4 pound of italian sausage
  • 1 block of mozzarella cheese
  • 2 tablespoons fresh parsley
  • salt and pepper to taste
First you will need to chop the onion, celery, carrots and garlic. 


Once this is done, put the ingredients in a heated pan with a bit of olive oil. Cook for 5 minutes or until the carrots are tender.


While you let those ingredients sauté, it's time to work with the tomatoes. I chose to buy canned whole tomatoes, but if you have tomatoes at home and are feeling adventurous you could certainly use fresh (just be sure to core the tomato first). 

First take the tomatoes out of the can and drain the juice. Be sure to save the juice, we will be using that in the sauce. After draining chop or mash the tomatoes into small pieces. You can pick the size based on how chunky you'd like your sauce.


Once the tomatoes are drained and chopped you will need to add them and the juice to the pan that has the carrots, onions, celery and garlic. 


Once all of the ingredients are incorporated you will need to let the sauce simmer in the pot for 30 - 45 minutes. This will help build the flavor and thicken it up a bit. If you're finding that the sauce is too watery you can add some tomato paste to thicken it up. Once the sauce looks right and your kitchen is smelling amazing, it's time to add it to the crust!

I pre-heat my oven to follow the instructions for the crust I bought (400 degrees). I put the sauce on the crust and then added my favorite toppings.


Since I bought a pre-made crust the pizza really only needs to cook long enough to melt the cheese and get all the toppings warm. At 400 my pizza cooked for about 15 minutes. Once it was done I sprinkled on some fresh cut basil and was ready to dive in!
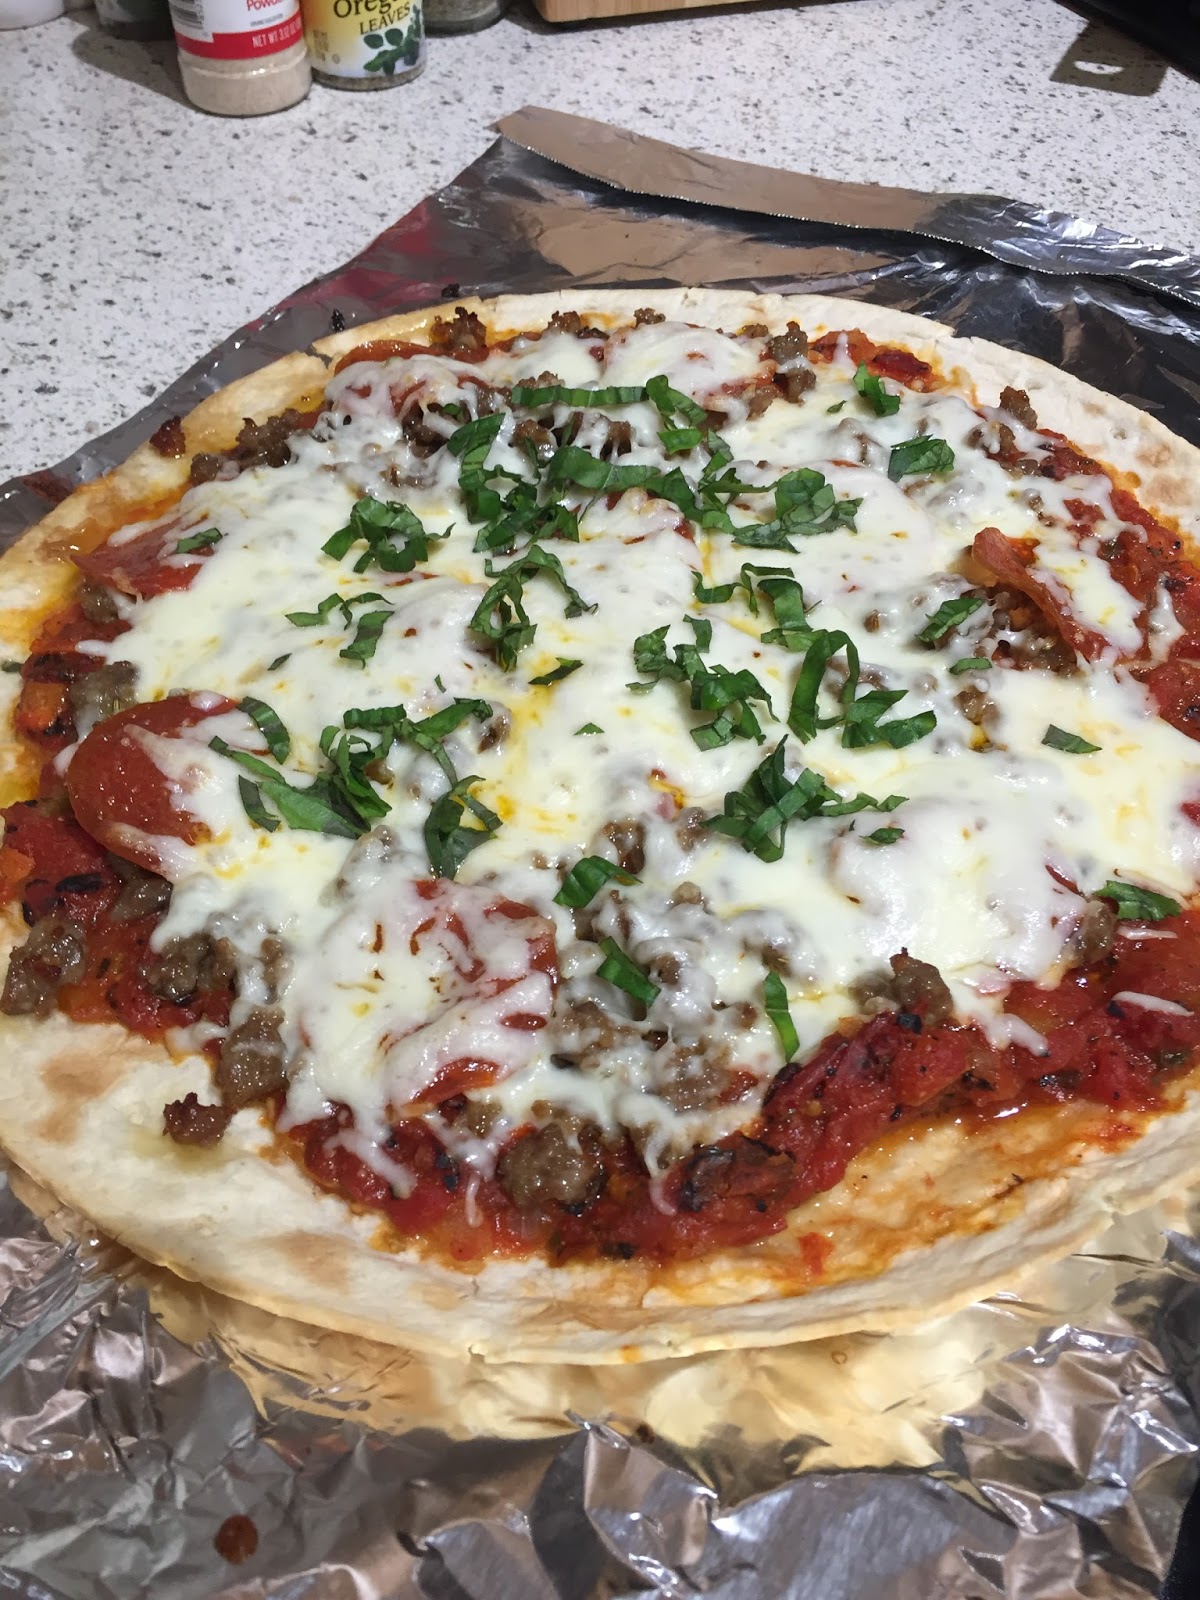

While I won't claim to have made a pizza as good as we had in Italy, this did turn out really tasty! The sauce is thick and chunky and all of the ingredients really made it flavorful. I probably won't use this thin crust again because the sauce didn't really stick to it so we had to eat with a fork and knife (which is actually how the Italians eat pizza anyway!). 

This sauce was delicious and I had plenty of remaining after making 2 pizzas. I plan to freeze it and use it over pasta!




Monday, February 17, 2014

Chicken and Bacon Fettuccine

Sometimes on a Monday night you just need to embrace comfort food. Not necessarily because it was a hard day (aren't all Mondays?), but more because making it through the first day back from the weekend is a real accomplishment. Especially after 6+ inches of snow... thanks again Minnesota.

Tonight on the menu was Chicken and Bacon Fettuccine. Yes you read that right, BACON. This simple twist on a classic really adds a nice depth of flavor. Check out the delish photo and recipe below. Enjoy!


INGREDIENTS
4.5 oz fettuccine noodles
2 tablespoons butter
2 tablespoons all-purpose flour
1 cup chicken broth
1/4 cut half and half
3/4 cups diced chicken
3 slices bacon (cooked crisply)

DIRECTIONS
Turn your oven to 400 degrees and place the bacon on an un-greased cookie sheet. While the bacon is cooking, boil the fettuccine noodles and sear your chicken in a pan. Instead of using chicken breasts, I really like to used the pre-cut frozen Tyson chicken - it's a lot easier and tastes exactly the same!

While all the ingredients are doing their thing, you can begin to build the sauce in a separate pan. If you don't want to make your own sauce, you can of course use your favorite Alfredo sauce from the jar.

Once everything has finished, simply just combine it into one pot, add some oregano/basil/parsley and you're done! Don't plan on having left-overs - it's THAT good! 

Sunday, February 9, 2014

Cheesy Chicken Orzo


These past few weeks I have been making a conscious effort to meal plan. Instead of just buying the same things each week at the grocery store and hoping for different results, I dedicated 30 minutes to my Saturday afternoon to think of meal options for each day of the week. I really liked doing this because I could make sure we have a variety of meals throughout the week and we rely less on the frozen varieties... You can also try to pick recipes that leverage some of the same ingredients to try and be more cost effective.

One of the meals from this plan was a tasty Cheesy Chicken Orzo. I'd never cooked with orzo before, so this was a first for me. For those of you that don't know, orzo is basically in between rice and noodles. It's a pretty fun alternative to your pasta game if you're looking to mix it up.

This recipe is VERY simple and quite yummy. The base ingredients are pretty neutral so you can flavor to your liking. For this meal my Mom was over and she doesn't like much spice. If it were just T and I, I probably would have opted for some red pepper flakes or cayenne pepper. Instead, I went with the 'safe' Italian seasoning.

Check out the recipe below and give it a try! It's a nice rotation into your weeknight meals that's a synch to make and only takes about 20 minutes!

INGREDIENTS

2 tablespoons olive oil
2 whole chicken breasts cut into 1-inch cubes
salt and pepper to taste
1 cup orzo
1/2 cup shredded cheddar cheese
2 tablespoons butter
1/4 cup milk
tablespoons italian seasoning 


Instructions
Heat olive oil in a large skillet.
Add chicken pieces to the skillet, season with salt and pepper, and cook over medium heat until done; about 10 to 15 minutes, stirring occasionally. Set aside.
Bring a pot of water to boil, and stir in the orzo.
Cook for 5 minutes, or until orzo is tender.
Drain.
Put the orzo back in the pot and stir in the cheese, butter, and 1/4 cup milk; add more milk if needed. Continue to stir until smooth and well combined.
Stir in the cooked chicken.
Taste for salt and pepper and italian seasoning.
Serve.

Monday, December 9, 2013

Easy Twist: Upside Down Pizza

If your house is anything like ours, we tend to get bored of the same routine - pasta, tacos, chicken, pizza - sometimes you need to shake it up! But then you start thinking of shaking up, and that means an extra trip to the grocery store, and more planning on your weekend when all you really want to do is....nothing! So how do you avoid the dinner hum drums? Just take some of your favorite dishes and mix it up a bit using what you already have!

This is what we did this weekend when Sunday was rolling around and I didn't have a plan for dinner. I knew we had what was needed to make pizza, but how could I switch it up a bit? I looked to my friends at www.pillsbury.com and got a great idea! Upside Down Pizza!


This was a really easy and fun dish. We ommited the olives because, well they're gross. Take a look below and try it out for yourself!

Ingredients


1
lb bulk mild Italian pork sausage
1
jar (14 oz) pizza sauce
1
package (8 oz) sliced fresh mushrooms
2
cups shredded mozzarella cheese (8 oz)
1/2
cup sliced drained roasted red bell peppers (from 7.25-oz jar)
1/4
cup sliced ripe olives
1
can (13.8 oz) Pillsbury® refrigerated classic pizza crust
2
tablespoons olive oil
1/2
teaspoon Italian seasoning
2
tablespoons grated Parmesan cheese

Steps

Heat oven to 400°F. Spray 13x9-inch pan with cooking spray.
In 12-inch nonstick skillet, cook sausage over medium-high heat 10 to 12 minutes, stirring occasionally and breaking up sausage with spoon, until no longer pink. Drain if necessary. Stir in pizza sauce, mushrooms, mozzarella cheese, bell peppers and olives. Spoon mixture into pan; spread evenly.
Unroll dough. Shape dough to fit over sausage mixture in pan. Brush dough with olive oil. Sprinkle with Italian seasoning and Parmesan cheese. Use sharp knife to make several 1-inch slits in dough.
Bake 25 to 30 minutes or until crust is golden brown.

Sunday, August 25, 2013

Grilled Honey Teriyaki Chicken and Tropical Rum Punch

This week I celebrated my 25th birthday and it was quite a week (I even had my own hashtag - #jspearbdaywk). I wasn't feeling very celebratory heading into 25, but it just goes to show that having amazing friends can make anything fun.

Last night I hosted a Luau complete with grass skirts and coconut bras (head to my Facebook page for pictures). For my food contribution I made a Grilled Honey Teriyaki Chicken. This is an easy recipe that really pleased everyone (the chicken was gone within a matter of minutes). What made this chicken tasty was the brine. Check out the ingredients and directions below:

Grilled Honey Teriyaki Chicken
8-10 Chicken Breasts
Brine
2 cups water
1 cup brown sugar (I used dark)
1/2 head garlic, unpeeled
4 slices gently bashed ginger root
2 tablespoons salt
8 sprigs fresh thyme

Teriyaki Glaze
2 cups teriyaki sauce
1/2 cup honey
1 large ginger root
1 head garlic (halved)
1 teaspoon sesame oil
Dash of pepper
Scallions and toasted sesame seeds for garnish

To get started, simply mix all the ingredients for the brine together and pour into a resealable bag. Slice the chicken into desired sizes and dump into the bag. Once the bag is sealed place in the fridge for at least 2 hours.


While the chicken is in the brine mix all of the sauce ingredients together in a bowl and set aside. Heat your grill to medium heat and place the chicken on the grill. Each piece should cook about 10 minutes on each side. Once the chicken is done remove it from the grill and place it in the bowl of sauce. Once the chicken is coated place it back on the grill to cook for 4-5 additional minutes. All that's left after that is to eat it!


Tropical Rum Punch
These portions are suggestions. Honestly this drink will be delicious no matter what so you can portion to your liking (more citrus, alcohol content, etc.). 

1 cup lime juice
2 cups grenadine
2 cups Jamaican white rum
1 cup light rum
2 cups pineapple juice
2 cups orange juice
orange, lime, and lemon slices for garnish


Sunday, June 17, 2012

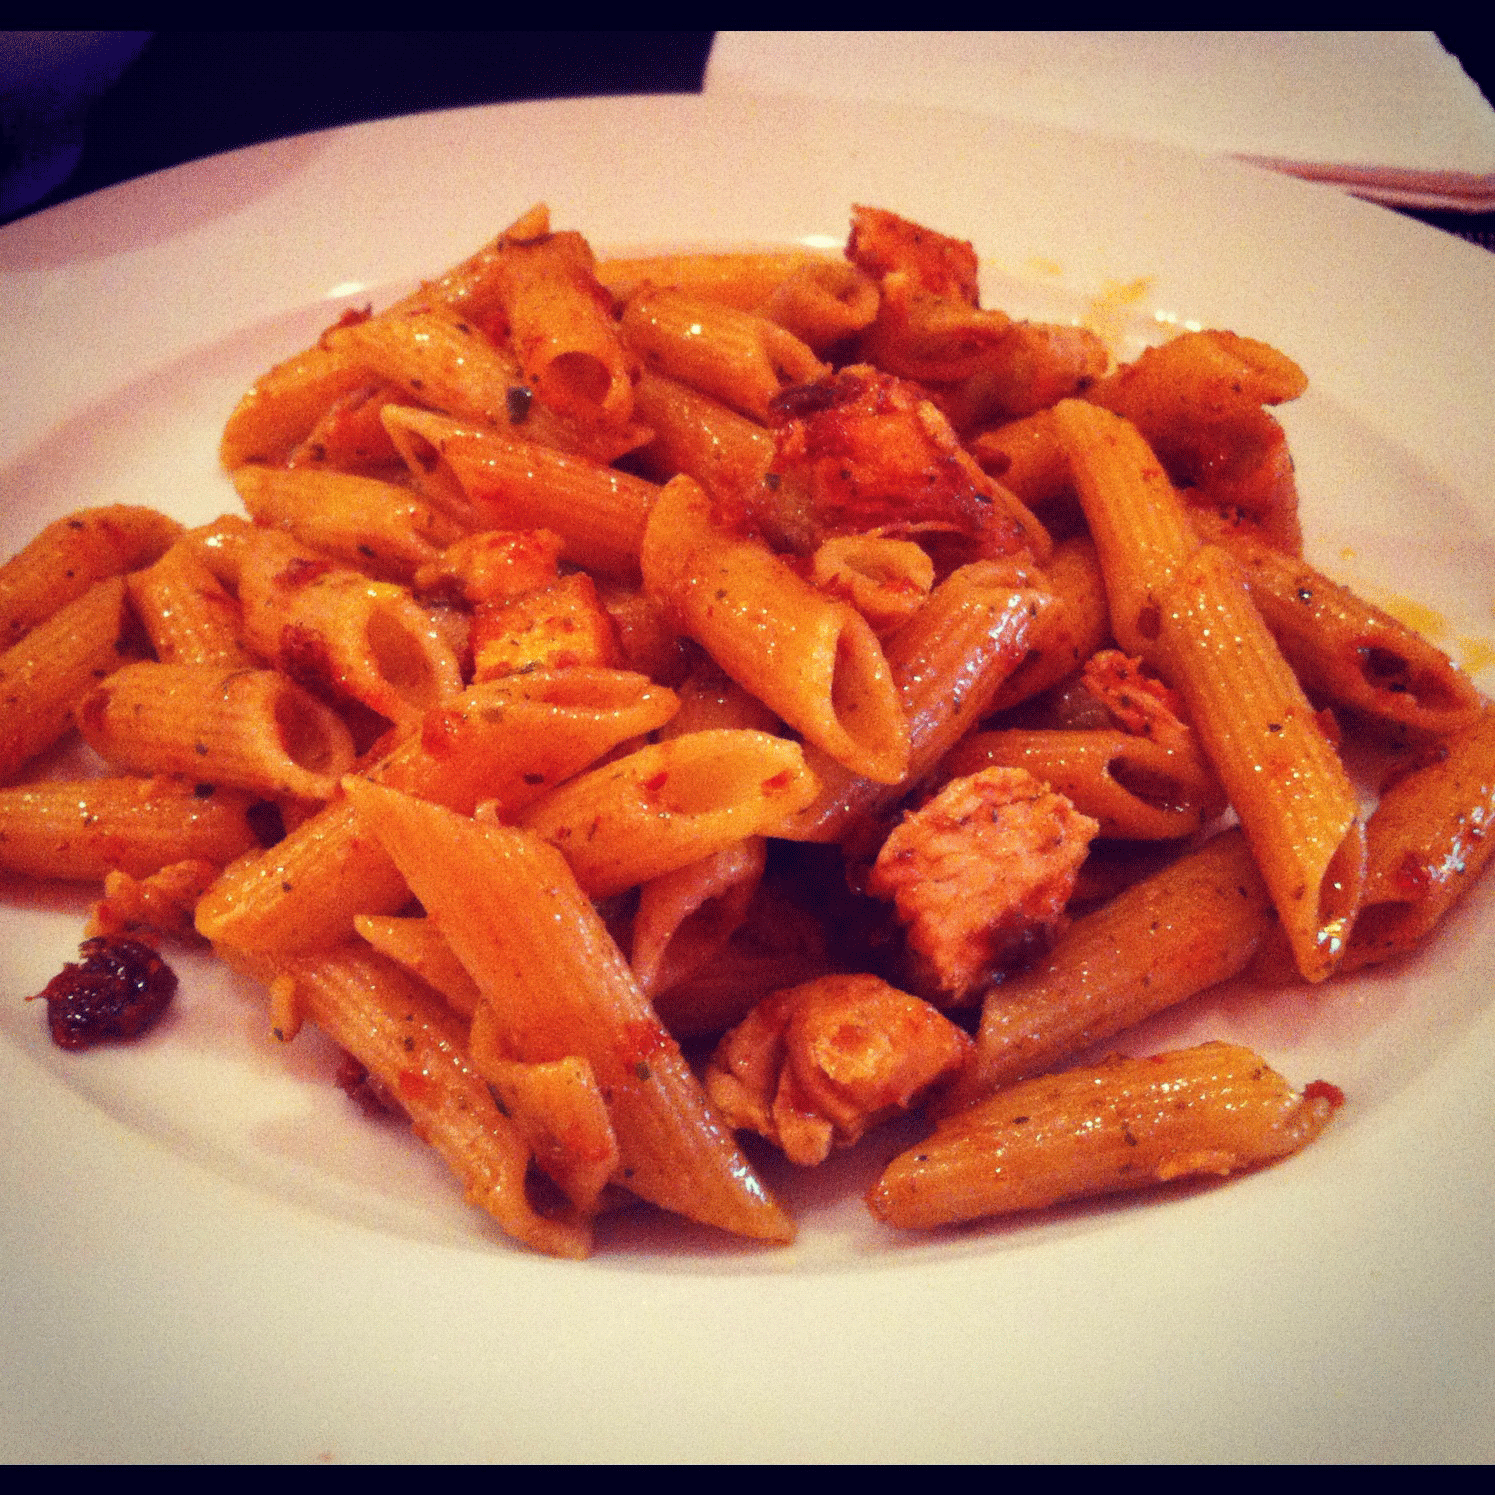
Sun-Dried Tomato Chicken Pesto Pasta


Summer is FINALLY here. That means a lot coming from someone who lives in Minneapolis. While this past winter certainly wasn't as bad as the year before, it's definitely nice to see the sun shining, flowers blooming, and smell the glorious smell of people grilling-out. Grilling is honestly one of my favorite summer past-times. I could do it everyday. And now that I've stepped up my culinary skills, grilling can go so much further than just burgers and macaroni salad. You can do veggies, chicken breasts, skewers, and more. It's all relatively simple, so I don't plan on blogging any of these meals - unless I come across something that has to be shared.

That's why I'm posting one of my new favorite recipes - Sun-Dried Tomato Chicken Pesto Pasta. I've posted a pesto pasta before, but this adds a fun twist - but both dishes are extremely easy, quick, and are a good way to impress your family and friends.

RECIPE
1 Box Penne Noodles
1 bottle of Sun-Dried tomatoes in olive oil
2 Chicken Breasts
Grated Parmesan Cheese
1 Cup Fresh Basil
2 Cloves Garlic
Salt, Pepper, Olive Oil to taste

DIRECTIONS
I already know that a mixer/chopper is on my Christmas list. Until then however, I have to resort to using my blender - which actually isn't all that bad. The first step is to make the pesto which is all of the ingredients except the noodles and chicken. You can pretty much just dump everything in as-is, except I chopped the garlic to help it out a bit. As much as I love garlic, no one wants a big chunk in their first bite. That's no way to make a good first impression.


Once you think you've mixed your sauce well enough, you can taste to see if anything needs to be added. This is where I added the extra olive oil. **NOTE** The sauce will taste stronger on your fork, than it will when finished. The noodles will absorb the flavor, so don't freak out if you think the taste is too strong. It not only helps all the ingredients come together, but it also helps the blender and keeps it from getting dry.


While you're mixing the sauce, you should also be cooking your chicken breasts. I just did this in a skillet, cooking both sides for about 5 minutes each. I then cut them into small chunks and added to the cooked pasta with the sauce. You should mix them all together and then test for taste. I added more olive oil here as well. 


Garlic cheese bread and a salad are nice sides to add to this dish as well.


Sunday, January 15, 2012

Chicken Teriyaki - "Battling Addictions"

"Hello. I'm Jonathan. And I'm addicted to Carbs."


Friends, it's been a while. How have you been? Hopefully you haven't given up on those New Year's resolutions yet. You know, they say that 42% of American's abandon their resolutions before the end of January. I think that means one of two things: 1) Our resolutions are unreasonable, or 2) we have no will power. I typically tend to fall to the latter...BUT - not this year (I've said this before)! As many of you know I'm in my second round of P90X (which comes with a strict nutrition plan). This means that veggies are in, and carbs are out.


Do you have any idea how many carbs a person eats?? They're in everything: pasta, bread, buns, crackers, cake, brownies, cookies - ahh! It's safe to say that I have an obsession. It's been a rough road quitting cold turkey. They should make a patch or something. I digress.


I bring this whole point up because in 2012 I plan to blog healthier - or at least will try. Going through this "Life Change" - I've also realized the importance of a guilty pleasure now and then. Those typically happen on the weekend, which is when I decide to blog. So please, don't call me out if I have a weak moment and post a pasta - or confess to a batch of brownies. 


So for my first entry of 2012, I present Chicken Teriyaki - a simple, easy, yet delicious way to make a quick meal your whole group will enjoy. 


Teriyaki Sauce
2 cups water
1/2 cup teriyaki sauce
1/4 cup honey
1-inch peeled ginger root


This sauce is so easy, and really takes your traditional teriyaki sauce to the next level. Simply combine the water and honey in a sauce pan and bring to a boil. This will dilute the honey. Once that has happened, add the ginger and teriyaki sauce and bring the heat down to medium.


Chicken
4 chicken breast
salt
pepper
garlic powder
onion powder
toasted sesame seeds
scallions


I've always had a problem when I try to sauté chicken. No matter what I do it always comes out tough. This week, I had a break-through. It's the type of meat and how you prepare it even before cooking! I typically buy a bag of frozen chicken breast (after all, we have to be economical). But this week, I bought 4 fresh chicken breast straight from the butcher. They went straight from the store, to my cutting board. This made a HUGE difference.


Take the breasts and trim off any fat. As you're doing this, you can also take a mallet (or the bottom of your pan if you don't have this sophisticated kitchen tool) to tenderize the meat. Season with the salt, pepper, garlic, and onion powder before placing in a pan with olive oil. 


Flip the chicken every 4-5 minutes so it cooks evenly. Once the chicken is done (after about 10-15 minutes - you can cut a slit inside to make sure - there shouldn't be any pink), take the sauce that has been staying warm in a pan and pour it in with the chicken. This will help the meat absorb the sauce right before you serve it.


Before you serve the chicken, make sure to sprinkle the toasted sesame seeds on top. They add a bit of crunch and really help in the presentation. You can slice into smaller pieces, or serve as a whole breast. I chose to slice and serve on a bed of whole wheat brown rice and steamed broccoli. 


So for my first foray into the kitchen in 2012 - I think I did pretty good, don't you? Give this recipe a try and let me know what you think! And remember, if you're going to give up your resolution, try to wait until February. Don't become another statistic :)


Until next time, happy cooking! Bon Appétit!

Sunday, October 30, 2011

Long Time, No Blog - Enchiladas, Red Pepper Salsa, Mexican Corn, Spanish Rice


So it's been a long time since my last post. I'd like to think you've been waiting with a bated breath, hoping each time you turn on your computer that you'd see a new post from me; but lets be honest, that probably hasn't been the case. I'm not really quite sure why it's been so long. I made this meal over a month ago and have had these pictures on my desktop waiting to be posted, but never felt the gumption. So here it is...

I always have this urge to do Mexican. I didn't use to have a taste for it, but as I've gotten older it's started to grown on me. But when I say Mexican, please don't think I mean "authentic" Mexican. Yes - I am definitely guilty of cooking and enjoying the American-ized version of Mexican food. Maybe once I've had a little more experience in the kitchen I'll be more willing to try some authentic dishes, but right now - I'm sticking to what I'm comfortable with. The dishes are super easy, and a crowd pleaser - so you should try them too!

Enchiladas


1 Package flour or corn tortillas (I used Whole Wheat)
1 lb lean ground beef (or chicken)
1/2 White Onion
1 package taco seasoning (recommended: Old El Paso)
1/2 jar Salsa (recommended: medium, chunky)
1/2 jar queso (recommended: salsa con queso)
Shredded Cheddar, Pepper Jack Cheese
1 cup enchilada sauce

First pre-heat your oven to 375 degrees.Take 6 of your tortillas and place them on a cooking sheet covered in aluminum foil sprayed with cooking oil. Spray the top of the tortillas with the cooking spray, and bake in the oven for 5-7 minutes. In the meantime, begin browning your ground beef in a skillet on high heat. Take the package of seasoning and follow the directions. Then take the salsa, onion, and queso and add them to your meat.

Once you have the enchilada filling finished, take the tortillas out of the oven. Now I'm going to admit that I am not good at this next part. You need to take about 2 to 3 spoon-fulls of your filling and add them to the center of the tortilla. Then fold up the two ends, and then the sides to form a pocket. Flip the enchilada over so the "seam" is down. Repeat this for all of the enchiladas.

The last piece for this part of the recipe is coating the top of your tortillas with the enchilada sauce and shredded cheese. Keep your oven at 375 and bake for 15-20 minutes.


Red Pepper Salsa
1 Red Pepper
1 Green Pepper
1/2 jar of salsa
1/2 packet of taco seasoning

I honestly made this dish up - but it turned out pretty good! Simply take the above ingredients and mix together in a pan to sauté. Once the peppers have softened, and are cooked thoroughly - take out a serve as the perfect side dish!

Corn and Rice
Rice - follow recipe on box


So there you go - I finally posted this recipe that has been sitting in the que for over a month. Hopefully you enjoyed my "Americanized" version of enchiladas. I'm heading to the grocery store and feeling inspired. So, until next time...

Happy Cooking!

Sunday, September 4, 2011

Pineapple Honey Chicken and Salsa, Steamed Asparagus, Roasted Red Potatoes


Chicken. Chicken. Chicken.


I know. You're probably thinking the same thing I was. "Why is EVERYTHING chicken??" This past Saturday I was grooming through some of my favorite cooking websites trying to pick a dish for Sunday's dinner (ps - my real new favorite website is Suri's Burn Book. You HAVE to check it out) and couldn't find a dish that didn't include chicken. 


Now, don't get me wrong - I love chicken. But sometimes, enough is enough right? Well it didn't seem that way, so I needed to find a way to put my own spin on it. I've made garlic lime chicken, rosemary chicken, grilled chicken, but never honey pineapple chicken. It sounded good, so I made the decision and headed to the grocery store.


This dish is great because it uses what must be everyone's favorite protein (judging by the amount of popular recipes online), but puts a fun twist on it to make it much more than just another chicken dinner. It's super easy too - so you won't be spending all day in the kitchen either.


Chicken and Glaze Recipe 
3 Chicken Breasts
2 Cups Honey
1/2 Cup of Brown Sugar
1 Cup Pineapple Juice
1/2 Lemon, Squeezed
1 Bundle of Basil


Directions
First, take all of the above ingredients (minus the chicken) and stir them together in a large bowl. Once the mixture is finished, pour it into a skillet to boil for about 5 minutes. This helps all the ingredients combine together and not separate after stirring. When it's finished, just take the pan and move it to the side for later.


Meanwhile, in another greased skillet, take your chicken breasts and cook them for about 3-5 minutes on each side. **Note** You're not completely cooking them here, just browning the skin a bit to add some more color.


Now pour the glaze over the chicken breasts in a pan and bake for 20 minutes (pre-heated oven at 450).


Pineapple Salsa Recipe
2 Cups Diced Pineapple
1/2 Purple Onion
1/2 Cup Green Onions
1/2 Red Pepper
1/2 Yellow Pepper
2 teaspoons Cayenne Pepper
1/2 Cup Honey


Directions
This salsa was SUCH a surprise. I literally made it up as I went because I wanted to add a little something special to this dinner. It's so great when you can do something like this because you feel like a real chef, and it's so gratifying when it turns out good (trust me, not all of my own creations end this way :)). 


All you need to do is chop the ingredients above, mix together, and then stick in the fridge for a bit to let everything mix together.


Roasted Red Potatoes Recipe
1/2 lb Small Red Potatoes
1/2 Cup Olive Oil
Salt
Pepper
Cayenne Pepper


Directions
I've blogged about roasting these potatoes before, so I won't go back into the detail. The only adjustment I've made here is making sure that all the potatoes are covered nicely with the oil to make sure they don't get crunchy. I also added some of the cayenne pepper to kick them up a notch. Cayenne has become one of my new favorite spices.


The last piece of this dish is the steamed asparagus. I had never steamed before, but I am definitely doing it more often.


All you need to do is buy a cheap steam ($10 at target) and put it in a pot with a little water at the bottom. Once the water is boiling, throw in your veggies and cover with a lid. The steam should cook the vegetables in under 20 minutes. It's super easy, and a nice alternative to roasting or keeping them raw.


And there you have it - another week of successful cooking. I was really happy with how this turned out because I needed to jazz up the typical chicken dinner. I also created my own salsa that is actually perfect with some chips too! That's the great thing about being new in the kitchen. You're learning each time you cook, but you gain enough knowledge to start coming up with your own ideas. Hopefully you can think of something for yourself too!

Until next time, happy cooking!